

Key Takeaways
Why Fluid Checks Matter
Your car depends on a handful of fluids to keep its systems cool, lubricated, pressurized, and clean. When any one of those fluids runs low or degrades, the damage can happen quietly — until you're stranded or facing a large repair bill. The good news is that checking most fluids is genuinely straightforward, even if you've never popped a hood before.
This guide walks you through the six most important fluids to monitor, what each one does, and how to read the level indicators correctly. For a broader look at routine upkeep, see our routine maintenance guide covering everything from oil changes to brake inspections.
What you will need
The Six Fluids to Check Regularly
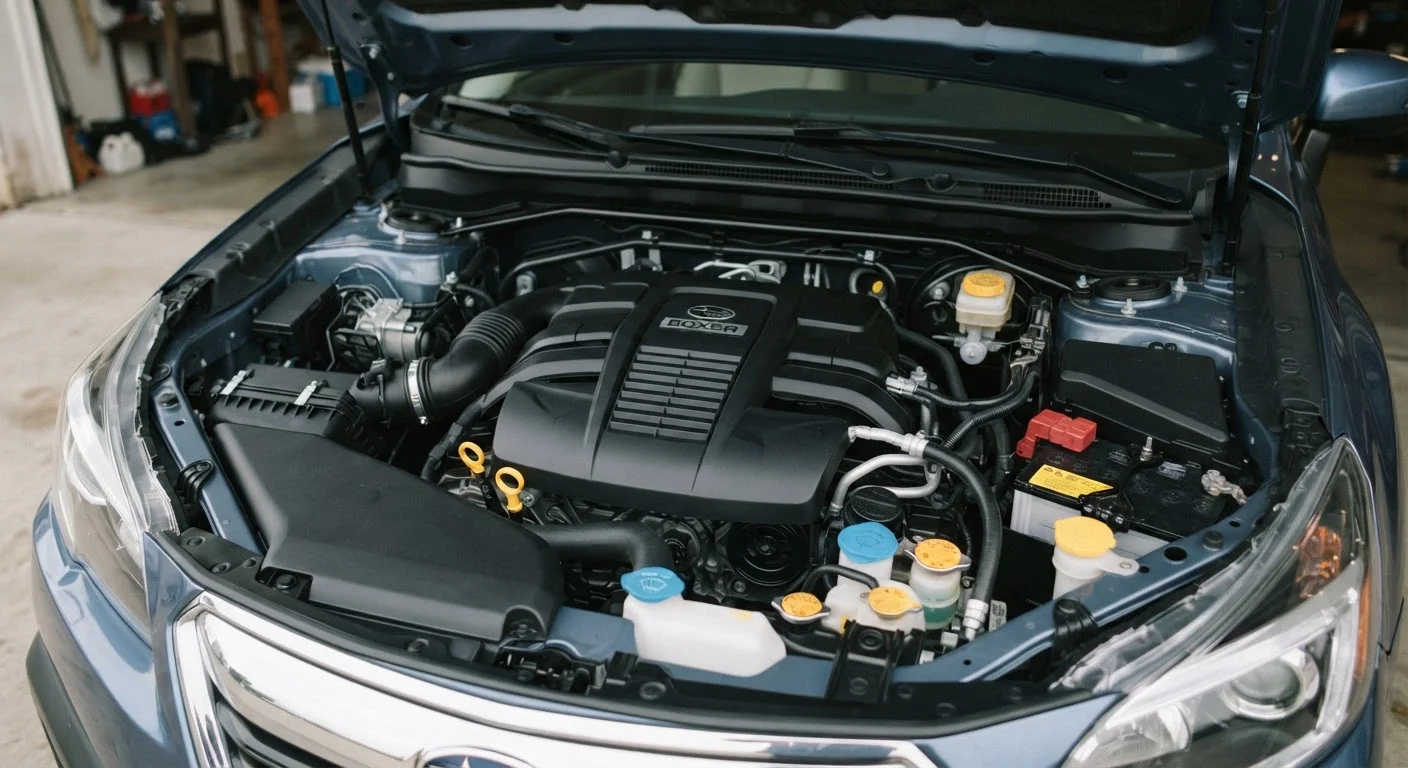
Open your hood and locate the following reservoirs. Most modern vehicles label them directly on the cap or nearby. Always consult your owner's manual if you're unsure — reservoir locations vary by make and model.
Owner's Manual
Identifies exact fluid specifications, reservoir locations, and recommended service intervals for your specific vehicle.
Clean Rag or Paper Towels
Used to wipe the dipstick clean before taking an accurate reading.
Flashlight or Phone Torch
Helps you see fluid levels in reservoirs with dark or opaque walls, especially in dim garage conditions.
Fluid-Safe Funnel
Prevents spills when topping off fluids in narrow reservoir openings.
Check Engine Oil
Locate the oil dipstick — usually a brightly colored loop or handle near the front of the engine. Pull it out, wipe it clean with your rag, reinsert it fully, then pull it out again. The oil level should fall between the two marks (MIN and MAX, or LOW and FULL). Also look at the color: fresh oil is amber; very dark or gritty oil is a signal it's nearing its change interval. See our guide to engine oil types and change intervals for more detail.
Check Coolant (Antifreeze)
Find the coolant reservoir — a translucent plastic tank connected to the radiator, often marked with a temperature warning symbol. With the engine cold, check that the fluid level sits between the MIN and MAX lines on the side of the tank. Coolant should look clean and brightly colored (typically green, orange, or pink depending on the type your vehicle uses).
Check Brake Fluid
The brake fluid reservoir is a small, semi-transparent plastic container near the back of the engine bay on the driver's side. The level should be between MIN and MAX. Brake fluid absorbs moisture over time and darkens in color — very dark fluid (approaching brown or black) typically means it's time for a flush, which a mechanic should perform.
Check Power Steering Fluid
Many newer vehicles use electric power steering and have no fluid to check — your owner's manual will confirm. If your vehicle has hydraulic power steering, find the reservoir (usually labeled with a steering wheel icon), and check the level against the MIN/MAX markings. Some reservoirs have a dipstick built into the cap; others are translucent so you can read the level visually.
Check Transmission Fluid
Automatic transmissions typically have a dipstick similar to the oil dipstick — check your owner's manual for its location and whether the engine should be warm or cold when checking. Pull, wipe, reinsert, and read. Transmission fluid should be pinkish-red and clear. A dark color or burned smell means service is due. Note: many modern vehicles have a sealed transmission with no dipstick, requiring a shop to inspect.
Check Windshield Washer Fluid
The washer fluid reservoir is easy to identify — it typically has a windshield-and-water-arc icon on the cap. This is the one fluid where running low carries no mechanical consequence, but clear visibility is a real safety factor. Top it off with a premixed washer fluid solution. Do not substitute water alone, especially in climates where freezing temperatures occur.
Build a Monthly Five-Minute Habit
Picking one day a month — say, the first Saturday — to do a quick fluid walk-through takes less than five minutes once you know where everything is. Catching a slow leak or low level early is far less disruptive than an unexpected roadside breakdown. New to overall vehicle upkeep? Our complete introduction to car maintenance covers the full picture.
If you're deciding which tasks to handle yourself versus handing off to a shop, our article on DIY car maintenance tasks breaks down that distinction clearly.
What to Do If a Fluid Is Low or Discolored
A slightly low level on engine oil or washer fluid is easy to remedy — top it off with the correct fluid type listed in your owner's manual. However, if brake fluid or coolant is consistently dropping without an obvious cause, that's a sign of a leak that needs professional attention, not just a refill.
Discolored fluid is a separate concern. Engine oil that looks dark gray or has a milky appearance can signal contamination. Bright green or orange coolant that appears rusty or murky is past its service life. In either case, schedule a service appointment rather than continuing to drive.
Never Mix Fluid Types
Using the wrong coolant, transmission fluid, or brake fluid can damage seals, corrode internal components, and void warranty coverage. Always confirm the correct specification in your owner's manual before adding any fluid — the label on the reservoir is a reminder, not a substitute for verifying the exact type required.
For fluids that get overlooked until something breaks, our piece on commonly overlooked maintenance tasks is worth reading alongside this guide. And before winter or summer arrives, run through our seasonal maintenance checklist — fluid condition is one of the first things to verify before temperature extremes hit.